• Amazon Deals

  • Ebay Affilliate Links

Nokia N95 how to recover data with screen or keypad broken and unresponsive

nokia_n95_flexcable_slider_broken_recover_contacts_succesful_method
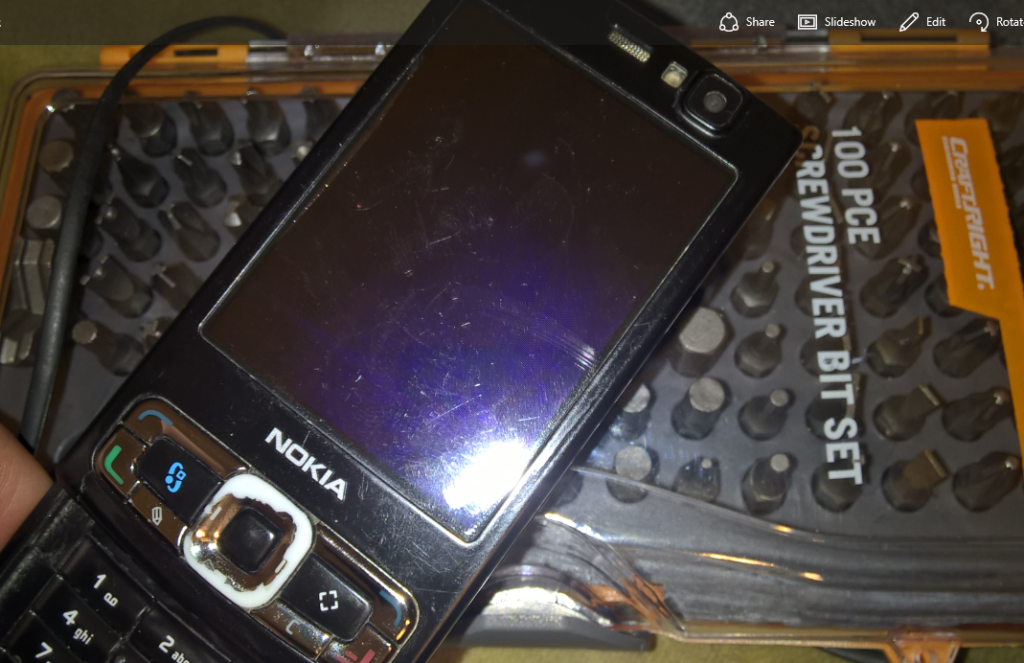
Recently my trusty Nokia N95 died of advanced age… or, probably the technological version of a stroke. Initially, the signs of impending terminal illness were there, slurring of words, blurred vision, disorganised display… paralysis down one side of the keypad, and eventual complete screen and keypad death.

However, I was busy, ignored the cries for help, convalescence, and urgent data recovery attention, and so I plowed on, assuming it was just an irritating software problem that would eventually right itself via the age old method of dealing with temperamental technology- turning it off and on again. Repeatedly. Often. A typical ham fisted implementation of an old IT guys remedy. 

Just like when people are showing the signs of a stroke, when essential technology starts going on the
fritz, you have to act FAST to avert data Armageddon… 🙁


nokia_n95_8gb_synch_backup_data_recovery_success_broken_phone_screen_keypad_flexNot an ideal situation, since had not gotten around to backing up all my contacts for over a year.

Worse still, the old backup was not in human readable text form- I needed another N95, or old school Nokia smartphone of a similar Symbian era to decipher the backup and recovery package for me.

Plugging it into my PC with the USB cable to recover data off a Nokia was a fruitless pursuit while using the old version of the Nokia PC suite which related to the bygone era the phone came from.. circa 2008. Not to mention that old versions of PC suite and the drivers suitable for win XP and win 7 were not compatible with Windows 10, causing another issue. Even so, even the old windows 8.0 tablet I had kicking about could not connect to the phone successfully, even though it had done so in the not so distant past 12 months. The reason was that when plugging the phone into a computer, usually you have to engage phone side by confirming few things- pressing the odd button to authorise the USB connection of the phone to the computer. With a dead screen on my Nokia and worse still, an unresponsive keypad that was dead as a doornail, including the home and select keys, even memorising the keypresses required that are up on blogs on the internet was not a solution.

Getting a view on the mobile screen while it was broken or damaged beyond legibility I found a solution to- by plugging in the AV out cable in, and connecting to a monitor or TV via the RCA cables. With a broken keypad though, the knowledge that my phone was like a locked in coma patient, unable to receive stimuli from the outside world and communicate just added to my frustration.

I tried one last thing- plugging the phone into a brand spanking new, (but pretty horribly budget, cheapo thing)
nokia_suite_version_great_data_recovery_transfer_to_lumia
running a new build of win 10, on HP hardware resulted in the Nokia N95 device being recognised, and the required software and drivers that were most up to date being loaded.

The relevant version of Nokia suite is 3.8.54.

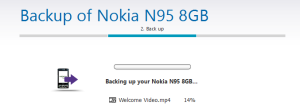
Somehow, the software bypassed all the problems associated with the broken slider flex
strap, like the phone demanding the time before doing anything, or needing keypresses to acknowledge, nokia_n95_contacts_recovered_data_broken_phoneconfirm or authorise the USB connection and data backup and syncing.

A really nice part of the software was the option to take the entire address book, photos, contacts and calendar of the old Nokia N95, and transfer it seamlessly to the new Lumia I’m now using. This is a pretty exciting new innovation I have not seen documented on the web yet, so thought it worth sharing.nokia_n95_copy_transfer_contacts_to_lumia

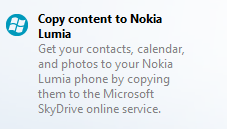
For quite a while, I had thought data and profile transfer between old Symbian Nokia N95’s and the New Lumia’s was impossible and unsupported, but it seems the capability had been developed now. Bravo Microsoft!.. That Lumia had been sitting untouched and unloved in my drawer for close to 6 months till now because it looked like too much trouble and effort switching.. or well. making the necessary upgrade to a modern phone.

Yes, I know its just a plan for me, and other die hard vintage Nokia users to give up on our archaic technology and modernise into the world of endless data hungry connectivity and irritating social updates… but oh well. When one thing dies, it makes room for a newer, sharper generation.

I’m Just glad that the new software actaully supports such old phones, and does a very good job of extracting difficult to obtain data out of them relatively painlessly. There were a lot of great memories.. and tracks sored on that phone which I’m glad I have not lost.

nokia_n95_8gb_synched_dead_screen_keypad_flex_cable


How to create bootable Windows to go USB drive + Convert .esd to .Wim Windows 8.0 / 8.1 / 10

This post is a FULL tutorial on how to create a bootable “windows to go” USB drive without the enterprise edition of windows 8.0 or 8.1

Windows to go- A portable operating system on a memory stick!

Normally, a portable, bootable standalone operating system on a USB version of windows 8, or 8.1 is only able to be officially created by a licensed copy of the enterprise edition of windows.

However, there is a nice workaround that can be done, so you can create a “to go” version of windows on a USB with just a standard pro license of 8.0 or 8.1. Its just a bit more involved though, and requires you to use a couple clever 3rd party programs and some patience to pull it off.

Apparently this technique may work for windows 10 too! Just need to test it! Comment below if it works for you!!

I managed to do this only after searching for quite some time, and piecing a number of tutorials together as i encountered various problems along the way via trial and error.Microsoft is crafty, and reads the tutes that appear on the web… and shuts down convenient wormholes that allow you to really act as a power user of windows.. instead of a zombie.

Given the annoyance and trouble I went to last night to produce a licensed, portable version of windows that simply runs off a USB thumb drive, I thought it worthwhile to write this post to make it easier for others out there.

Ingredients for a USB install of windows:

  • A blank USB flash drive with 16GB+ of spare capacity. (MEM-1)
    • This is the USB you will be putting the live working version of portable windows 8 on!!
    • A 32GB+ USB 3.0 Drive is recommended, but a slower USB 1.0/2.0 will work just fine.
    • Larger capacity drives will give you some more space to install other programs and have user files in there as well.
    • Don’t have any other data on this stick! it’ll get deleted when you put the portable operating system on it. Back up your data somewhere else, and you can put it back on this stick once the installation process is finished and you have your USB version of windows up and running!
  • ANOTHER Blank USB flash drive with 8GB+ capacity (MEM-2)
    • You may need this one if you don’t have a CD of windows OS install- read on!
  • Your Windows 8.0 or 8.1 CD key / Serial number.
    • Look on the bottom of your laptop, or in the box your windows tablet came with for the registration keys related to your windows license.
  • A copy of Windows 8.0 or 8.1 Install media (ISO FILE or installation CD)
    • This is usually the recovery and windows reinstalling CD that often comes with your laptop or tablet (often filled to the brim with bloatware)
    • If you don’t have the CD, or don’t like the bloatware your hardware manufacturer puts in the box with your device/computer, you can download the windows 8.0 or 8.1 installation files off the microsoft website for free.
    • BEWARE! DONT get it off another internet bit torrent or sketchy russian website source- it will probably contain some kind of nasty computer virus, botnet slaver or creepy spyware esigned to steal your credit card numbers!
    • Windows 8.0 / 8.1 : Microsoft site- Free and legal windows 8 installation files
      • Download and use the media creation program to obtain the windows ISO file you need.
    • Windows 10 : Microsoft windows 10 free download of installation files
  • A working installation of the “Rufus” utility by AKEO consulting – FREELY downloadable!
    • Click on this link to get a Free Download of RUFUS from its creator
    • Rufus is a very useful little program that allows you to create bootable USB flash drives, and load ISO images on them, as well as MS-DOS (Freedos) bootable drives, and format them correctly in FAT32, NTFS and more. (Why formtting is important we will get to later in the tute)
  • A working installation The GImageX program – FREELY Downloadable!
    • Click on this link to Download free GImageX from AUTOIT
    • This program hooks into a command line microsoft utility that is used by network admins to do custom installs of windows. For us, the average Joe, RUFUS overlays a pretty graphical user interface (GUI) to make it easier to use.

Backdoor Method for creating a windows to to USB drive with no Enterprise edition.

Step 1: Format Memory sticks using RUFUS utility.

  • Run RUFUSRUFUS_format_no_image_mount
  • Error check your Memory sticks (both MEM-1 & MEM-2 using RUFUS
  • REFORMAT your memory sticks to NTFS format, NOT anything else.
    • FORMAT is VERY IMPORTANT! If you use FAT32, the following process will throw a “cannot create file or folder” error when your write your windows setup files to the USB later on.
    • Why the error? Apparently it has something to do with the limitations of how many files can be put onto the root directory of a FAT32 volume.


STEP 2: Find install.wim file, or install.esd file.

  • Grab your secondary memory stickrufus_Win2go_mount_ISO
  • Take the ISO file of WIN 8 you got from the CD, or downloaded from Microsoft directly, and use RUFUS to mount the image on the stick.
  • Search the directory “sources” for a file called “install.wim”
  • If you can find it, happy days! note down the exact file path- you can then skip step 3!
  • BUT, Chances are, if you downloaded your ISO install media image from Microsoft recently, there WILL BE NO WIM FILE, which will cause you a hassle!. Microsoft has upgraded their media to an encrypted format called .esd to make it harder for people to make custom installs without more advanced knowledge.
  • IF there is NO “install.wim” file, look for a file called “install.esd” and you will have to undertake step 3.
  • Note down the file path of “install.esd”
  • What we need is a .wim file, so we will need to convert .esd to .wim somehow.

STEP 3 – Convert esd file to wim

  • Bring up a command prompt as “administrator” – i.e. an elevated command prompt.
  • Log the memory stick drive that you mounted the ISO image of the WIN-8 setup to earlier using RUFUS.
  • navigate to the sources directory
  • type the following to interrogate the index.esd file in there:
  • >> dism /Get-WimInfo /WimFile:install.esd
  • interrogate_ESD_file_CMD_PROMPT
  • Then enter the following command string to easily convert the ESD file into a WIM file.
    • >> dism /export-image /SourceImageFile:install.esd /SourceIndex:1 /DestinationImageFile:install.wim /Compress:max /CheckIntegrity
  • convert_ESD_to_WIM_command_prompt_win2go
  • Note, this command will dump the file into the same directory- “sources”
  • Note the path of the new install.wim file you have created.

STEP 4: Image the Install.wim file onto A USB drive using GImageX software.

  • Run GImageX software
  • Click on the “apply” tab
  • Set the following:
  • Source: The path of the install.wim file you found or created earlier from an .esd file.
  • Destination: The USB drive you wish to install windows to go on.
  • load_wim_with_GImagex_step1
  • Click the Apply button, and the program will install a portable version of Windows 8 on the targeted USB drive.
  • This could take quite a while. Because, in my case, was installing from USB stick to USB stick, it took over SEVEN HOURS to complete!
  • Probably not a good idea in hindsight- but I’m not sure if the process woudl work if i moved the WIM file to the C: drive instead. Try that, and let me know how it goes, comment!
  • When complete, the USB drive will now have a working copy of Windows 8 to go on it.
  • The first time you run it, it may go through the registration process, after then, it should just work.

STEP 5 – Mark the USB partition “active” using Windows Disk management tool

Bring up the windows utility “Disk Management Tool”

Select the External USB drive you have your windows 2 go install on

Right click, and on the menu that comes up, click on “mark partition Active”

However, if the “mark partition active” option is greyed out, you will have to use the elevated command prompt program “Diskpart” to get this to work.

In this case, at the command prompt to start the program; type

>> diskpart

Then , to bring up the official names of all the disks on the computer, type:

> list

  • Then,

>> list partition

  • and finally, type

>> Select partition 1

  • then, to mark the selected partition as the active; type

>> ACTIVE

win2go_mark_primary_partition_as_active

DONE!

STEP 6: Load USB drive with “Boot Entries”

  • Open Command prompt as Administrator
  • Log your WInd2go drive as the active drive in the command prompt.
  • i.e. if your drive is E:
  • then simply type in: “E:”
  • Change directory to the system32 directory of your win2go drive
  • i.e. cd windows\System32 (for 32 bit installs)
  • type in;

>> bcdboot.exe E:/Windows /s /f ALL

  • This command string will install boot entries on the USB drive you are tying to get to run WIN2GO.

STEP-7 – BOOT Win2go

  • Switch on computer
  • configure you computer’s boot order in the bios menu.
  • On this computer, the boot order can be modified by hitting F10, its the same for many modern computers!

Thanks and credit has to be given to the other authors on the web who provided  guidance and inspiration for the tips you see in this post:


http://www.admin-magazine.com/Articles/Putting-Windows-8-on-a-USB-Drive

http://thehastingsfiles.blogspot.com.au/2015/06/converting-installesdto-installwim.html

http://www.instructables.com/id/How-to-Create-a-Bootable-USB-Drive-Without-Using-A/

http://www.howtogeek.com/196817/how-to-create-a-windows-to-go-usb-drive-without-the-enterprise-edition/


  • Amazon Deals